Showing posts with label Word. Show all posts

9/10/13

Tip #112 - Printing Specific Pages

100 (or more) Computer Tips in 100 (or more) Days

Tip #112 - Printing - just the pages you want!

So printing may sound like an easy activity. You're looking at the document, you go to the File menu or use your keyboard command (Ctrl p on the PC or Command p on the Apple) and up comes the print dialog box. You click the print button and walk to the printer. Why would I feel the need to write anymore about the topic. Well I was just helping my husband print a variety of pages from a PDF he downloaded and I was able to print five of the eight pages all at the same time. 

Before I printed the document I scrolled through it and realized that he only needed to print some of the pages, the rest were advertisements or instructions that he didn't need. I made note of the pages to print and then brought up the print command. Rather than going with the default "All" pages, you need to click in the "Pages" box. If you want a range, type the first page number followed by a dash and then the last page number. For non consecutive pages, type a page number followed by a comma and then the next page number. As you can see in the screen shot, I wanted to print pages 1, 3 and then 5 through 7. This sure beats printing each page or group of pages separately!

So how easy is that? If you look carefully you will find in all documents the ability to enter specific pages rather than printing the whole document.

Happy Computing!

Diane

Don't forget to click the Subscribe to 100 Computer Tips in 100 Days via email link on the right side of the screen so you get email alerts when Diane adds a new post.

Want more tech news or interesting links? You'll get plenty of both if you keep up with Diane McKeever, the writer of 100 Computer Tips in 100 Days, by subscribing to her Facebook posts or visiting her web page, www.dianemckeever.com . 

8/9/13

Tip #110 - Special Characters on Apple

100 (or more) Computer Tips in 100 (or more) Days

Tip #110 - Special Characters on Apple

My Apple friends have been feeling neglected by my posts. Hopefully they will be happy to find out how to insert special characters (such as accented letters, copyright symbols, foreign language punctuation, etc) into their documents. Here is a printable list so that you can have it handy when you need to insert any of these characters.


You might find that if you just print this page the sheet will print too small. If that's the case you should right-click (Ctrl click) and choose "Save As" to save the picture to your hard drive and then print from there. If you have trouble doing this please send me an email (diane@dianemckeever.com) and I will send a full size version of this chart to you.

If you have an iPad or iPhone you don't need this list. Hold down your finger on any vowel and a list of accented characters will pop up! Brilliant!

Happy Computing

Diane

Don't forget to click the Subscribe to 100 Computer Tips in 100 Days via email link on the right side of the screen so you get email alerts when Diane adds a new post.

Want more tech news or interesting links? You'll get plenty of both if you keep up with Diane McKeever, the writer of 100 Computer Tips in 100 Days, by subscribing to her Facebook posts or visiting her web page, www.dianemckeever.com . 

7/25/13

Tip #108 - Microsoft Office's Quick Access Toolbar

100 (or more) Computer Tips in 100 (or more) Days

Tip #108 - Microsoft Office's Quick Access Toolbar

When the 2007 version of Microsoft Office came out there was a lot of user frustration. Everything was moved off the menu area that people had come to know and love, or at least know if not love. The menus were gone, replaced by tabs and ribbons. As users became more familiar with the new interface they realized that familiar actions took a few more clicks than they used to but accepted, grudgingly, the new reality. But there is hope!

Microsoft left one customizable area in the Office suite, the Quick Access Toolbar. The Quick Access Toolbar is located along the upper left side in all of the Microsoft Office programs. This handy toolbar is very easy to customize and it is a place I head to when setting up client's computers. The first item I add to the Quick Access Toolbar is "Quick Print". Adding Quick Print enables the user to send the current document to the default printer to print one copy...all without seeing the print dialog box! Yea. You want two copies, click the button twice. This is the same "Print" button we had on the toolbar for years before the big change. 

Other options I like to add are "New" to create a new document with one click, "Open" to bring up the Open dialog box and, my all-time favorite, "E-mail" which will attach the open document to an email, even if the document has not been saved! I really love the E-mail button. It will work on most computers but not if you're using a public computer such as at a library. 

Depending on how the client uses specific programs I will often add the "Sort" buttons in Excel and the "Format Painter" in Word. The picture below is of my Quick Access Toolbar, see how I've added my favorite icons. 


Adding items to the toolbar couldn't be easier. Move your mouse on the down triangle on the right side of the Quick Access Toolbar and click. A menu of the most popular tools will appear. Click as many of these tools as you would like. The tools will be displayed in the order that you click them so give that some thought. You might uncheck some and then recheck them to change the order on the toolbar. If you don't see your favorite tool listed then click on the "More Commands" option. Every single command is listed here. 

When adding icons to the Quick Access Toolbar, you might consider adding options even though they are currently available on a tab. Keep in mind that the Quick Access Toolbar is visible no matter what your current tab might be so rather than changing to a specific tab just so that you can click on an option, add it to the Quick Access Toolbar and you don't have to change tabs. 

I hope customizing the Quick Access Toolbar makes it easier and quicker for you to use the Microsoft Office programs.

Happy computing!

Diane

Don't forget to click the Subscribe to 100 Computer Tips in 100 Days via email link on the right side of the screen so you get email alerts when Diane adds a new post.

Want more tech news or interesting links? You'll get plenty of both if you keep up with Diane McKeever, the writer of 100 Computer Tips in 100 Days, by subscribing to her Facebook posts or visiting her web page, www.dianemckeever.com . 

6/27/13

Tip #104 - Push Pin Office Documents

100 (or more) Computer Tips in 100 (or more) Days

Tip #104 - Push Pinning Documents


I can't believe I forgot this really important tip that will help you re-open frequently used documents.

Microsoft Office has always kept track of recently opened documents and you could see a list of the four most recent documents at the bottom of the File menu. In 2007 Microsoft expanded this list to display the last eighteen documents. At the same time they included the option to pin a document to the list so that it would never roll off, making it a cinch to open frequently used documents again. 
When you visit the File tab in the 2010 and 2013 Office programs (or the Office Button in 2007), you'll notice that when you click on Recent on the left panel two columns appear to the right. The left column contains recently used documents, the right column displays recently visited folders. Both of the columns have push pins available to the right of each entry. Click the pin once to "pin" the document/folder to the menu. 

This feature is particularly outstanding for those of you who are in a network environment where you have to do many clicks to navigate to network drives. Those drives are available now with one click.

Happy computing!

www.dianemckeever.com


6/8/13

[Hack] Hi Guess the Brand v1.1.6


Application Name: Hi Guess the Brand
Current Version: 1.1.6
iTunes Url: https://itunes.apple.com/us/app/hi-guess-the-brand/id640450806?mt=8

Hack for Non-Jailbroken and Jailbroken.

-- MAX Skip Puzzle
-- MAX Reveal Letter
-- MAX Remove Letter

Read more »

5/6/13

Tip #95 - Office's Vanishing Tools


100 Computer Tips in 100 Days

Tip #95 - Office's Vanishing Tools


The new ribbon user interface on Office 2007 and 2010 is quite fancy, and once you get used to it, it's a lot of fun to use. One of its few downsides is that it's tall – far taller than a traditional toolbar. If you’ve got a 25 inch monitor that’s fine but if you're working on a laptop or are otherwise pressed for screen space, it can sometimes be handy to collapse the ribbon and make it as compact as a regular menu.

To collapse it, simply double-click one of the ribbon's tabs, such as Home. The whole thing will instantly shrink down to the line of tabs, hiding the options. Clicking a tab will temporarily expand it back allowing you to make a selection. After you have made your selection the ribbon will again be hidden.

A double click on any one of the tabs again will expand the ribbon to its original size.

Happy Computing!

Diane

Don't forget to click the Subscribe to 100 Computer Tips in 100 Days via email link on the right side of the screen so you get email alerts when Diane adds a new post.

Want more tech news or interesting links? You'll get plenty of both if you keep up with Diane McKeever, the writer of 100 Computer Tips in 100 Days, by subscribing to her Facebook posts or visiting her web page, www.dianemckeever.com . 


5/3/13

Tip #92 - Rolling Through Office Ribbons


100 Computer Tips in 100 Days

Tip #92 - Rolling Through Office Ribbons


Because the Ribbons of options first introduced in Office 2007 were continued in Office 2010,  it’s safe to say that Microsoft will probably keep them around. As you probably know, clicking once on one of the tabs changes the ribbon you are viewing. While this is not difficult you might be interested in trying another way to roll through the ribbons

With your mouse on the ribbon area of the screen, roll the wheel on the mouse. Rolling the mouse toward you moves you through the ribbons from left to right, rolling the wheel away from you activates the ribbons from right to left. This is a particularly helpful tip if you don’t quite know which tab an option is on. 

Happy Computing!

View Diane's Webpage for more tips. 

4/30/13

Tip #89 - Word Document Map


100 Computer Tips in 100 Days

Tip #89 - Word Document Map


In the last tip we talked about using Styles in a document to quickly and consistently format a document. Another reason for using styles is so that you can view the Document Map for easier navigation and rearrangement of your document. My document for this blog would have been tedious to navigate if I didn't use the Document Map.

The Document Map for a Microsoft Word document
By applying Heading 1, 2 and 3 styles to my document, a hierarchical map was developed that I can display by clicking on the View tab, Show group, Navigation Pane. A pane appears on the left side of the screen that shows you the first few words using the paragraph style. I can click on the headings to navigate to that part of the document.

Beginning with the 2010 version of Word, in addition to navigation, I can move whole sections of the document around by dragging the headings up and down in the Document Map. No selecting, cutting and pasting, just drag the heading and release the mouse button. Because my title style included the numbering feature, my tips were automatically renumbered. This is important information for attorneys, engineers, architects and anyone else that uses numbered paragraphs.

Happy Computing!

View Diane's Webpage for more tips. 


4/29/13

Tip #88 - Word Styles


100 Computer Tips in 100 Days

Tip #88 - Word Styles


Microsoft has been trying for years to get you to use their built in styles in Word to make the formatting of your document easy and consistent -- and yet you continue to resist their efforts. In the 2007 and 2010 versions of Microsoft Word they have taken these styles and splashed them across the Home ribbon, hoping to entice you with them.
 
Styles included in Word
At a very minimum you should notice that there are two major styles, Normal and No Spacing. For those of you who do not like Microsoft’s new spacing defaults of extra spacing added between paragraphs and within paragraphs, select your document and click on the No Spacing style and all of that extra space will be removed. Of course you’ll have to go back to manually hitting the Enter/Return key twice between paragraphs. 
 
Modify styles dialog box.
Styles can make formatting long documents mindlessly easy. When you are starting a new area of your document all you have to do is click on one of the heading styles (Heading 1, Heading 2, Heading 3, etc.) in the Styles group of the Home tab. The formatting of the paragraph will change to conform to the choices Microsoft has made for that style. These formatting choices include font, color, size, alignment, spacing, pagination, etc. If you like the idea of using styles but don’t like the formats, you can right click on the style on the ribbon and choose Modify.  Use the Formatting options or click the Format button to access additional options. If you have already formatted your document with styles, all of the paragraphs that use the modified style will change automatically. 

Styles are a real time saver for long documents. Once you feel comfortable with them you’ll wonder why it took you so long to use them. There are styles in Excel also so look for them there too.

Happy Computing!

View Diane's Webpage for more tips. 


4/28/13

Tip #87 - Microsoft Office's Hidden Dialog Boxes


100 Computer Tips in 100 Days

Tip #87 - Microsoft Office's Hidden Dialog Boxes


When Office 2007 was introduced I thought the user interface was a great improvement over the classic menu driven access to commands. I also saw it as a huge training opportunity because everyone was confused about where their favorite commands had gone. Here it is six years later and people are still looking for their favorite options. Many of these options never made it to the ribbons. You can look as hard as you want, but your favorite option may be in one of the hidden dialog boxes.

 
Microsoft put these dialog box launchers in the lower right corner of the appropriate group. If you look at the Home tab, Font group you will see one of these little boxes. Clicking the launcher box will bring up the Font Dialog Box. Of course, you’ll see many of the choices from the ribbon but Small caps, for instance, isn’t included on the ribbon. Click on the Advanced tab in the Font dialog box and you’ll see the Scaling and Spacing options.

Look around at the ribbons and you’ll see that many of the groups have a dialog box launcher.

Happy Computing!

View Diane's Webpage for more tips.

4/25/13

Tip #84 - Copying Text from the Internet


100 Computer Tips in 100 Days

Tip #84 - Copying Text from the Internet


So you’re getting ready for vacation and you have found lots of good information on a variety of web pages. The most common thing people do is to print out the entire web page, all eight pages, even though you only wanted the information on page three. A way around this is to select just the information you need, copy it and paste it into a word document. That’s what we’re going to do today.

In preparation you should open your word processing program, whatever program that might be. Also open a web browser, again whichever program is your favorite. Use the search engine to find a webpage that has interesting information for you to copy. This could be a recipe, directions, or travel recommendations. After you have identified the information you would like to copy you need to select it. Do not use the select all command, because you will select too much information and it will be unmanageable.

You should use the click – shift click method to select the text. You might remember from an earlier tip that when we want to select a range of text we click (yes, a regular left click) at the beginning of the text, scroll down to the end of the text area, hold down the Shift key and click at the end. You need to make sure the Shift key is held down before you click at the end of the text. Now that the text is selected you will copy it. Use the keyboard shortcut of Ctrl (Command)+ c. I know it doesn’t look like anything has happened but remember that copy puts information on the Clipboard, a holding place in the computer’s memory. Now switch over to your word processing program. On the windows machines use the task bar along the bottom of your screen, in the Apple environment click the program on the docking area along the bottom. Once your word processing program is up we’ll use the paste command of Ctrl (Command) + v.

Now go back to your webpage and get some more text using the same technique. Happy copying and pasting.

Happy computing!

View Diane's Webpage for more tips. 


4/24/13

Tip #83 - Word Track Changes


100 Computer Tips in 100 Days

Tip #83 - Word Track Changes


Track Changes is a valuable tool in Word that allows you to keep track of all of the revisions you make to a document so that you can easily identify them. This feature is most frequently used by people sharing documents. One person creates the document and send it to another for editing. The second person turns on Tracking Changes, makes the changes, saves them and return the document to the first person. The originator of the document is able to clearly see the editing changes. In addition, the originator is able to go through the document revision by revision accepting or rejecting the changes.


 If more than one person needs to make changes than each person would to make sure that Tracking Changes was on. Then their revisions will automatically be made in a different color, making it easy to see all of the revisions made by an individual. Moving your mouse on a revision will also show you the name of the individual and the date and time the revision was made.

To turn on Track Changes go to the Review tab and in the Tracking group click on Track Changes. Then click on Balloons (to the right of Track Changes) to see the options for how to show the markup.  My preference is to show the revisions in line. 

Happy Computing!

Diane

Don't forget to click the Subscribe to 100 Computer Tips in 100 Days via email link on the right side of the screen so you get email alerts when Diane adds a new post.

Want more tech news or interesting links? You'll get plenty of both if you keep up with Diane McKeever, the writer of 100 Computer Tips in 100 Days, by subscribing to her Facebook posts or visiting her web page, www.dianemckeever.com . 


4/20/13

Tip #79 - Multilevel Lists in Word


100 Computer Tips in 100 Days

Tip #79 - Multilevel Lists in Word


For those times when you need to make an outline or other kind of multilevel list, Word has a dandy feature to help you. On the Home tab ribbon you’ll find the multilevel list option in the Paragraph group. Clicking on the down triangle reveals the assortment of lists that are available including numbered and bulleted lists. But that’s not all. These basic list types can be customized. 


Clicking on one of the choices will insert the first level of the list. Pressing the Enter/Return key will duplicate the level that you were just using. For example if you are using a multilevel list that has numbers, the first paragraph will have a “1” inserted at the beginning and pressing the Enter/Return key will insert the number “2”.  To indent to the second level you need to press the Enter/Return key, which will repeat the previous level, and then you press the Tab key. The Tab key indents you to the second level which might then insert a lower case “a”, if that’s the style you chose. When you have finished entering all of your second level entries you press the Enter/Return key again and then use a Shift Tab (holding down the Shift key and pressing the Tab key) to return to level 1. 

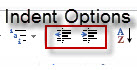
An alternative to using the Tab and Shift-Tab keys is the indent options on the Home tab, just to the right of the multilevel list option.

I sometimes find it easier to format the list after I've typed it. I turn on the multilevel list feature and then just type it as one long list. I then select all of the text that needs to be indented and click on the increase indent option. I find Word plays nicer using this approach.

Happy Computing!


4/16/13

Tip #75 - Important Microsoft Word Tips


100 Computer Tips in 100 Days

Tip #75 - Important Microsoft Word Tips


I see a lot of frustration when people are creating documents that have bullets and numbered lists. One of the things that makes bullets and numbered lists so convenient is that when you press the Enter key, you automatically get a new bullet or number. Well that’s all well and good but suppose you just want a new line, not a new bullet or number. Ah, here’s the secret.

When you press the Enter key you are creating a new paragraph and the new paragraph carries the same formatting (bullets/numbering) as the previous paragraph. To get a new line you need to hold down the Shift key and tap the Enter key. This is particularly helpful when you want to create second lines below bullets and numbers. This new line is sometimes called a “soft return”. I can see your blood pressure lowering already.

Another helpful keyboard shortcut in Word will give you a manual page break so that you don’t have to press the Enter (Return) key X# of times until a new page miraculously ma
terializes. When you want to get a new page hold down the Ctrl key and tap the Enter key.  The beauty of this is if you add information above the page break you just inserted, the words on the next page will not bump down too. On the Apple you’ll have to work a little harder. A page break is Fn + Shift + Return. You hold down the Fn and Shift keys at the same time and press the Return key.


4/10/13

Tip #69 - Comparing Documents in Word


100 Computer Tips in 100 Days

Tip #69 - Comparing Documents in Word


There I was merrily working on a document for a client, making changes and saving frequently, as I should, when I noticed I was not working on the most current version of the document. Ugh. I now had two versions and needed to combine them into one file. Fortunately Word has our back on this and we can use the Compare Documents feature. Whew.

Click the Review tab and, from the Compare group, choose Compare and then Compare again. The Compare Documents dialog box shows up.

Select the original document from the Original Document drop-down list. If you can't find the original document, click the wee folder icon to browse for it.

Select the edited document from the Revised Document drop-down list. As with the original document, you can locate the revised one by clicking the folder icon to browse.

Click OK. Word compares the two documents and notes all changes. Then it displays a list of changes, the compared document with changes marked, plus the original and revised documents.

Now use the Accept/Reject options on the Review tab to go through the document identifying the changes you would like to keep or reject.

Whew, saved again by a feature in Microsoft Office.

Happy Computing!


4/2/13

[Hack] Pic Combo v1.0


Application Name: Pic Combo
Current Version: 1.0
Itunes Url: https://itunes.apple.com/us/app/pic-combo/id623355606?mt=8

Hack for Non-Jailbroken.

-- 555,000,555 joker Remove
-- 555,000,555 joker Reveal

Read more »

3/26/13

Tip #54 - Automatic Bullets/Lists in Word


100 Computer Tips in 100 Days

Tip #54 - Automatic Bullets/Lists in Word


More than ten years ago Microsoft introduced AutoCorrect to the world. We talked in a previous blog post about how great this feature is. However, there is one aspect of this feature that really frustrates people…how Word automatically thinks you’re starting a bulleted or numbered list as you type when you start a paragraph with an asterisk (*) or with a number.

Microsoft is just trying to be helpful but I do agree this can be a little frustrating. But there’s an easy solution, all you have to do though is look for the little lightning bolt control menu that appears whenever the program automatically “corrects” something.  Move your mouse on the menu and click on what you want to do. As you can see from the screen capture you can undo Automatic Bullets, Stop Automatically Creating Bulleted Lists (forever) or Control AutoFormat Options…  The last of these choices will bring up the AutoFormat Options dialog box where you can review other options that you might want to change.

AutoFormat is not just a Word feature. Those of you who use Excel, PowerPoint, Outlook, and other Microsoft programs will recognize it too. Just look for the lightning bolt to control automatic changes. 

3/16/13

3/13/13

[Hack] Icon Pop Brand v1.0


Application Name: Icon Pop Brand
Current Version: 1.0
Itunes Url: https://itunes.apple.com/us/app/icon-pop-brand/id604803737?mt=8

Hack for Non-Jailbroken.

‧999,999,999 Tokens
‧No Ads

Read more »

[Hack] Icomania v1.1


Application Name: Icomania
Current Version: 1.1
Itunes Url: https://itunes.apple.com/us/app/icomania/id608197113?mt=8

Hack for Non-Jailbroken.

‧1,000,000,000 Remove Letters
‧1,000,000,000 Reveal Letters

Read more »