100 Computer Tips in 100 Days
Tip #52 - Screen Captures
 While you were always able to take a screen shot (picture of your screen) by tapping the Print Scr key on your keyboard, it took a picture of your entire screen which you then had to paste into a Word or PowerPoint document to crop it. Starting with Windows 7 Microsoft included the Snipping tool. The Snipping tool allows you to take a screen shot of a portion of your screen, helpful if you’re trying to show someone what you see on your screen, such as when you’re talking to technical about support computer issues.
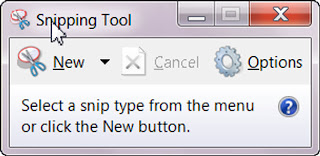
To access the Snipping tool, click on the Start button in the lower left side of your screen. When you do that your curser will be in the “Search Programs and Files” box. Start typing “snip”. By the time you get those four characters in the search box you should see the Snipping tool listed in the program menu above. Click on the Snipping tool. A window will pop up on your screen with the Snipping tool visible. Click the New button to take a picture of an area of the screen. Now drag your mouse on the screen to capture the picture. When you release your mouse another window will pop up with your screen capture. You can save it or copy it for use later.
In the Apple environment you can take a screen shot of your entire screen by holding down the Command and Shift keys and pressing the 3 key, but you can also zero in on just a portion. If you hold down the Command and Shift keys and press the 4 key, Mac OS X turns the cursor into crosshairs you can use to select whatever portion of your display you’d like to capture in a screen shot. Just as in the PC environment, you can paste the screenshot into a Word, PowerPoint or email.


No comments:
Post a Comment