100 Computer Tips in 100 Days
Tip #34 - Creating Forms in Word - Part 1
Word is probably the most popular and appropriate choice for creating simple forms. The form we will be talking about in this tip is a form that will be printed and people will fill in by hand. We will discuss creating forms that folks can fill in electronically in another tip.
The hardest part of creating a nice looking form is getting the line that people will be expected to write on correct. If you use the popular method in which you hold down the Shift key and use the underline key, you will create a line but the right side of that line will not stop at the same place for all of the form entries and just look messy. What you need to do is set a tab with a tab leader.
In order to do this we need to make sure the ruler is visible in Word. If you do not have a ruler visible go to the View tab and in the Show/Hide group click the checkbox for Ruler. If you are working with an earlier version of Word than 2007 or are on an Apple you should go to the View menu and make sure Ruler is chosen.
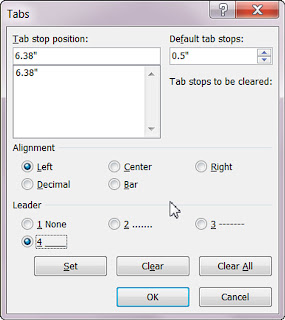
Now that you can see your ruler we can set a tab on it. Move your mouse up to the ruler, close to the right margin but still in the white area of the ruler. Your mouse should now look like an arrow. With the tip of the arrow just on the bottom edge of the ruler, click the mouse button once. You should see a small L shaped mark on the ruler. Keep your mouse in the same location and double click on the tab you just placed on the ruler. The tab dialog box should appear. If it doesn’t click cancel and try again.
 In the tab dialog box you will want to choose #4 in the leader section for a solid line and then click on OK. You have just set a tab on the ruler that has a solid line leading to it. In your document type “Name” and press the tab key once. You should see that a nice line appears from the end of the word Name to the tab you set on the ruler. Press the Enter/Return key and type “Address” and press the tab key. You can continue doing this down the page. Now that you know how to add tab leaders you should be able to add additional tabs on the ruler so that you can have “Cell phone” and “Home phone” on the same line with lines leading to them.
 This tip will require a little practice. Don’t get frustrated, you’ll get it.
Happy computing!


No comments:
Post a Comment